
Hiking is a fantastic method to spend time in nature while still getting some exercise. However, if you don’t take proper care of your hiking boots, they can quickly become ruined. One of the most important things you can do to extend the life of your hiking boots is to waterproof them properly. In this guide, we will discuss how to waterproof hiking boots and provide some useful tips on how to keep them in good condition.
The Different Types of Hiking Boot Material
There are a few different types of materials used in hiking boots. The most common are leather, synthetic, and Gore-Tex.
Leather is the most durable option and can last for years with proper care. However, it does require more maintenance than synthetic materials. Leather is also not as breathable as other options, so your feet may get sweaty in warm weather.
Synthetic materials are often made from nylon or polyester and are usually cheaper than leather boots. They’re also less bulky and more adaptable than leather. Anyway, they don’t usually last as long as leather and aren’t as waterproof either.
Gore-Tex is a waterproof, breathable material that’s often used in high-end hiking boots. It’s more expensive than other materials, but it’s worth the investment if you hike in wet or cold conditions.

Suede is another option for hiking boots, but it’s not as common as the other materials. The suede is made from the underside of cowhide and is softer and more flexible than leather. However, it’s not as durable and isn’t waterproof.
Nylon and synthetic materials are usually the cheapest options when it comes to hiking boots. They’re also often lighter weight and easier to break in than leather. However, they don’t last as long as leather nor are they as waterproof. A great benefit of nylon and synthetics is that they dry quickly if they do get wet. [1]
Products For Waterproofing
There are a number of different products available for waterproofing hiking boots. Some of the more popular options include:
- Sealant: this is applied to the outside of the boot and helps to create a barrier against water;
- Waterproofing spray: this can be applied to both the inside and outside of the boot and helps to repel water;
- Gore-Tex liner: this is placed on the inside of the boot and helps to keep your feet dry by allowing sweat to escape while preventing water from coming in;
- Wax and Beeswax: these are applied to the outside of the boot and help to create a waterproof barrier;
- Creams and Lotions: these can be applied to the inside of the boot and help to create a barrier against water;
Choosing a Boot Waterproofing Treatment
There are a lot of different products on the market for waterproofing your hiking boots. Some are spray-on treatments, some are cream or waxes that you rub into the leather, and some come in the form of impregnating treatment inserts that you slip into your boots before putting them on. There is no one perfect product, but there are definitely some that work better than others.
To decide which product is right for you, first consider what type of hiker you are. Do you hike mostly in wet conditions? Do you have sensitive skin? Do you mind if your boots feel a little stiff after treatment?
If you answered yes to any of these questions, then a spray-on waterproofing treatment is probably the best option for you. These treatments are usually easy to apply, quick-drying, and don’t require any rubbing or buffing into the leather. They also typically don’t cause any skin irritation or stiffen the leather too much.
The downside of spray-on treatments is that they don’t last as long as some of the other options. They also can’t be used on Gore-Tex or other breathable fabrics, so if your boots have any of those types of materials, you’ll need to choose a different treatment.
Cream and wax treatments need to be rubbed into the leather, which can take a bit of time and effort. You also need to be careful not to get any of the treatment on your clothing or gear, as it can stain. But if you’re willing to put in the extra effort, these types of treatments will keep your boots waterproof for much longer.

If you’re looking for the longest-lasting waterproofing treatment available, then impregnating treatment inserts are a good option for you. These inserts go into your boots before you put them on, and they help to waterproof the leather from the inside out.
Impregnating treatment inserts can last for several months at a time, and they don’t cause any skin irritation or stiffness. The downside of these inserts is that they can be a little tricky to put in, and they’re not always effective in wet conditions.
Prepare Your Boots for Waterproofing
If you’re starting with a brand-new pair of hiking boots, you’ll want to prep them before waterproofing. This will help ensure that the waterproofing treatment will be effective and last longer. Here’s what you need to do:
- Clean your boots thoroughly inside and out with a mild soap or boot cleaner. This will remove any dirt that could prevent the waterproofing treatment from working properly;
- If your boots are particularly dirty or have caked on mud, you may need to use a stiff brush to scrub them clean;
- Once your boots are clean, let them fully dry before proceeding. Waterproofing treatment won’t work if your boots are even slightly damp;
Applying the Waterproofing Treatment
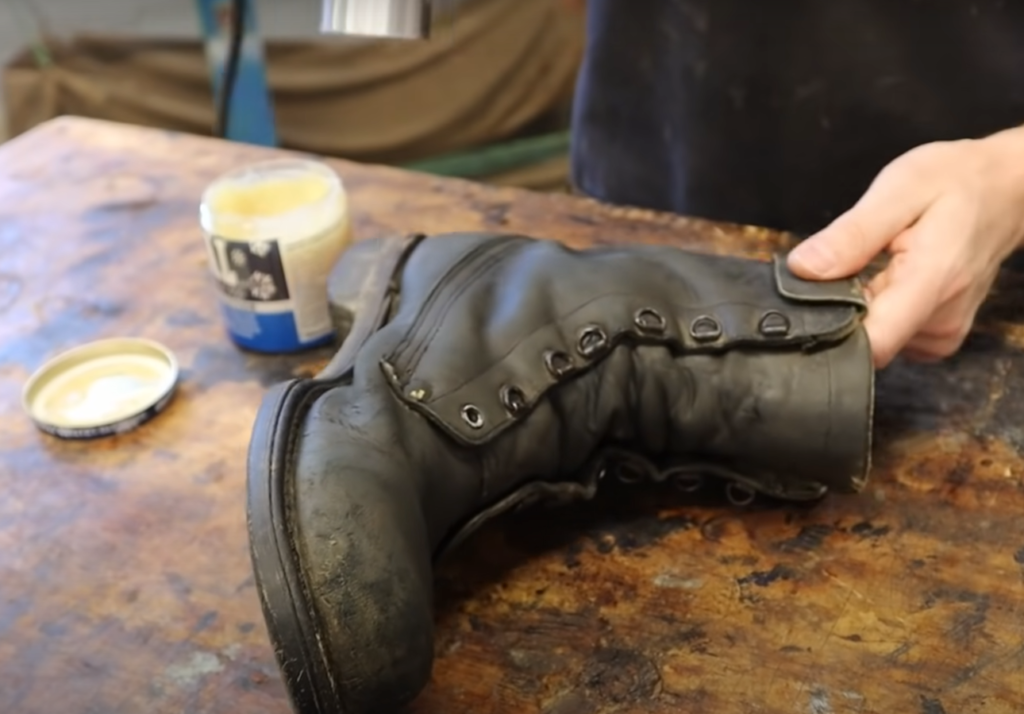
You’ll need to purchase a waterproofing treatment. There are many diverse brands and types of treatments available, so be sure to read the label carefully to ensure that you’re choosing the right one for your needs. Once you’ve selected a treatment, follow the instructions on the package for how to apply it. In most cases, you’ll simply need to brush the treatment onto clean, dry boots. Some treatments may require that you heat up the boots first in order to open up the pores of the leather, which will help the treatment penetrate deeper. [2]
After applying the treatment, let your boots dry. If possible, store them in a cool, dry place while they’re drying to prevent any mold or mildew from forming. With proper care, your waterproofed hiking boots should last for many seasons to come. Enjoy the trails!
Drying and Storage Tips After Application
Once you’ve applied the waterproofing treatment to your hiking boots, it’s important to follow a few simple tips for drying and storing them properly. First, be sure to let the boots dry – this usually takes about 24 hours. Secondly, store your boots in a cool, dry place out of direct sunlight when not in use. Finally, don’t forget to re-treat your boots regularly (usually every few months) to keep them looking and performing their best.

How To Waterproof Hiking Boots?
Waterproofing your hiking boots is important to protect them from the elements and prolong their life. There are many different ways to waterproof your boots, but the most important thing is to choose a method that will work for you and your environment.
One of the most popular methods of waterproofing hiking boots is using a spray-on waterproofer. This type of product is easy to use and can be applied directly to the boot. Spray-on waterproofers are available in many different formulas, so be sure to read the label carefully before purchasing one. Another advantage of spray-on waterproofers is that they can be reapplied as needed.
Another popular method of waterproofing hiking boots is using a wax-based waterproofer. This type of product works by creating a barrier between the boot and the water. Wax-based waterproofers are available in both liquid and solid forms, so be sure to choose the right one for your needs. Liquid waxes are easier to apply but can be messy, while solid waxes are more difficult to apply but will last longer.
Scrub Your Boots
Once you’ve decided on a method of waterproofing, the next step is to scrub your boots. This will remove any dirt or debris that may be trapped in the pores of the boot and help the waterproofing product to adhere better. Be sure to use a soft brush or sponge so you don’t damage the leather.
After you’ve scrubbed your boots, it’s time to apply the waterproofing product. If you’re using a spray-on waterproofer, be sure to follow the instructions on the label carefully. If you’re using a wax-based waterproof, start by applying a small amount to one boot and then working your way up from there.
Rinse Your Boots
Once you’ve applied the waterproofing product, you’ll need to rinse your boots in clean water. This will eliminate any excess product and help to seal the pores of the boot. Be sure to use lukewarm water so you don’t damage the leather.
After you’ve rinsed your boots, it’s important to let them dry. If possible, place them in a sunny spot or near a heater so they can dry faster. Once they’re dry, you’re ready to hit the trails!
Clean Your Boots
It’s important to keep your boots clean, even if they’re waterproof. Dirt and debris can still build up in the pores of the boot, which can eventually lead to leaks. Be sure to scrub your boots regularly with a soft brush or sponge.
If you notice any leaks in your boots, be sure to apply a new coat of waterproofing product. This will help to seal the leak and prevent further damage.
Re-Proof Your Boots
Even the best waterproofing products will eventually wear off, so it’s important to re-proof your boots on a regular basis. This will help to keep them in good condition and prevent leaks. Be sure to follow the instructions on the label of your waterproofing product to know how often you should re-proof your boots.
No Radiators
Never place your boots near a radiator or other source of heat, as this can damage the leather. [3]
Homemade / Do It Yourself Waterproofing
There are a few things you can do at home to help waterproof your hiking boots and make them last longer:
- One is to regularly treat them with a waterproofing spray or cream designed for leather shoes. This will help keep the water out and prolong the life of your boots;
- You can also try using beeswax or vaseline on the seams of your boots to help seal them and prevent water from getting in;
- Finally, make sure you always store your boots in a dry place when not in use, as this will help prevent them from developing mold or mildew;
Another option for waterproofing your hiking boots is to buy a pair that already comes with a waterproof treatment applied. Many brands now offer this feature, and it can be well worth the extra money to have one less thing to worry about when you’re out on the trail. just make sure to read the labels carefully so you know what kind of treatment has been applied, as some are not as effective as others.
FAQ
Can I make my boots waterproof?
Yes, you can make your hiking boots waterproof with a few simple steps:
- First, you’ll need to purchase a waterproofing spray or cream. You can find these products at most outdoor stores or online;
- Next, clean your boots with mild soap and water to remove any dirt or debris. Allow them to dry completely before applying the waterproofing spray or cream;
- Apply the product evenly over the entire boot, paying special attention to the seams and stitching. Follow the manufacturer’s instructions for the best results. Some products will need to be reapplied after extended use or exposure to water [4];
Waterproofing your hiking boots will help keep them in good condition and protect your feet from the elements on wetter days out on the trail.
How do you keep water out of hiking boots?
The first step is to make sure your boots are clean and dry. If they’re dirty, clean them with a brush or hose off any caked-on mud. Then, let them dry completely. Once they’re clean and dry, you can apply a waterproofing treatment.
There are a few different kinds of waterproofing treatments you can use on your hiking boots. Waxes and silicone spray are two popular options. Both work by creating a barrier that repels water. You can also find waterproofing treatments that contain fluorocarbons. These work by bonding to the fibers in the boot’s fabric and forming a water-resistant barrier.
Once you’ve applied the waterproofing treatment, be sure to let the boots dry completely before you wear them. This will give the treatment time to bond with the fabric and form an effective waterproof barrier. [5]

How do I waterproof my Merrell hiking boots?
The first step is to purchase a high-quality waterproofing spray or cream. Be sure to read the instructions on the product prior to use, as some products may require you to apply them directly to wet boots while others work best when applied to dry boots. Once you have your chosen waterproofing product, simply follow the directions for application.
Most waterproofing products will need to be reapplied after heavy use or exposure to extreme conditions, so be sure to check the manufacturer’s recommendations for frequency of use. With proper care and regular treatment, your Merrell hiking boots should stay in great condition for years to come!
What can you put on boots to waterproof them?
There are a few different types of waterproofing treatments that you can use on your hiking boots. The most common and easiest to find is a spray-on waterproofer. These usually come in aerosol form and can be found at any outdoor or sporting goods store. Another option is a beeswax treatment, which you can find online or at some specialty stores. Finally, there are water-repellent boot socks, which as the name implies, are socks that have been treated with water-repellent material.
Do Gore-Tex Boots Need To Be Waterproofed?
If you have Gore-Tex boots, you might be wondering if you need to waterproof them. The answer is yes! Even though Gore-Tex is a water-resistant material, it’s not completely waterproof. Water can still seep in through the seams and fabric of your boots, so it’s important to treat them with a waterproofing spray or cream.
Doing this will also extend the life of your boots. Waterproofing your boots will also make them more comfortable to wear in wet conditions, as they won’t absorb as much water and become heavier.
First, you need to decide whether you want a spray or a cream. Spray waterproofing products are generally easier to apply, but they don’t last as long as creams. Creams can be more difficult to apply evenly, but they provide better protection and can last up to several months. [6]

If you’re looking for a waterproofing product that will last long enough for multiple hikes, we recommend using a cream. If you only need short-term protection or want an easy-to-apply option, go with a spray.
Once you’ve decided on a spray or cream, the next step is to choose a product that’s specifically designed for hiking boots. Some waterproofing products can damage the fabric or finish of your boots, so it’s important to use one that’s safe.
We also recommend choosing a product that’s durable and easy to apply. A waterproofing spray or cream should last through several hikes, and it should be easy to re-apply when necessary.
Finally, make sure to read the instructions on the waterproofing product before you use it. This will help you ensure that you’re using it correctly and getting the best results.
Useful Video: Waterproofing Hiking Boots
Conclusion
Hiking is one of the best ways to get exercise and enjoy the beauty of nature. But if your hiking boots aren’t properly waterproofed, you can end up with wet, cold, and uncomfortable feet. No one wants that!
Now it’s time to get out there and enjoy the great outdoors! But remember, even the best waterproofing won’t last forever. So be sure to re-waterproof your boots regularly, especially if you hike often or in wet conditions.
With a little bit of care, your hiking boots will keep your feet dry and comfortable no matter what Mother Nature throws at you. So go forth and conquer those trails! Happy hiking!
References:
- https://trekbaron.com/what-are-the-types-of-hiking-boots/
- https://www.rei.com/learn/expert-advice/boots-waterproofing.html
- https://www.advnture.com/how-to/how-to-waterproof-hiking-boots
- https://everboots.com/blogs/news/diy-boot-waterproofing-at-home-2019#
- https://momgoescamping.com/keep-feet-dry-hiking/
- https://sectionhiker.com/should-you-waterproof-gore-tex-boots-2/